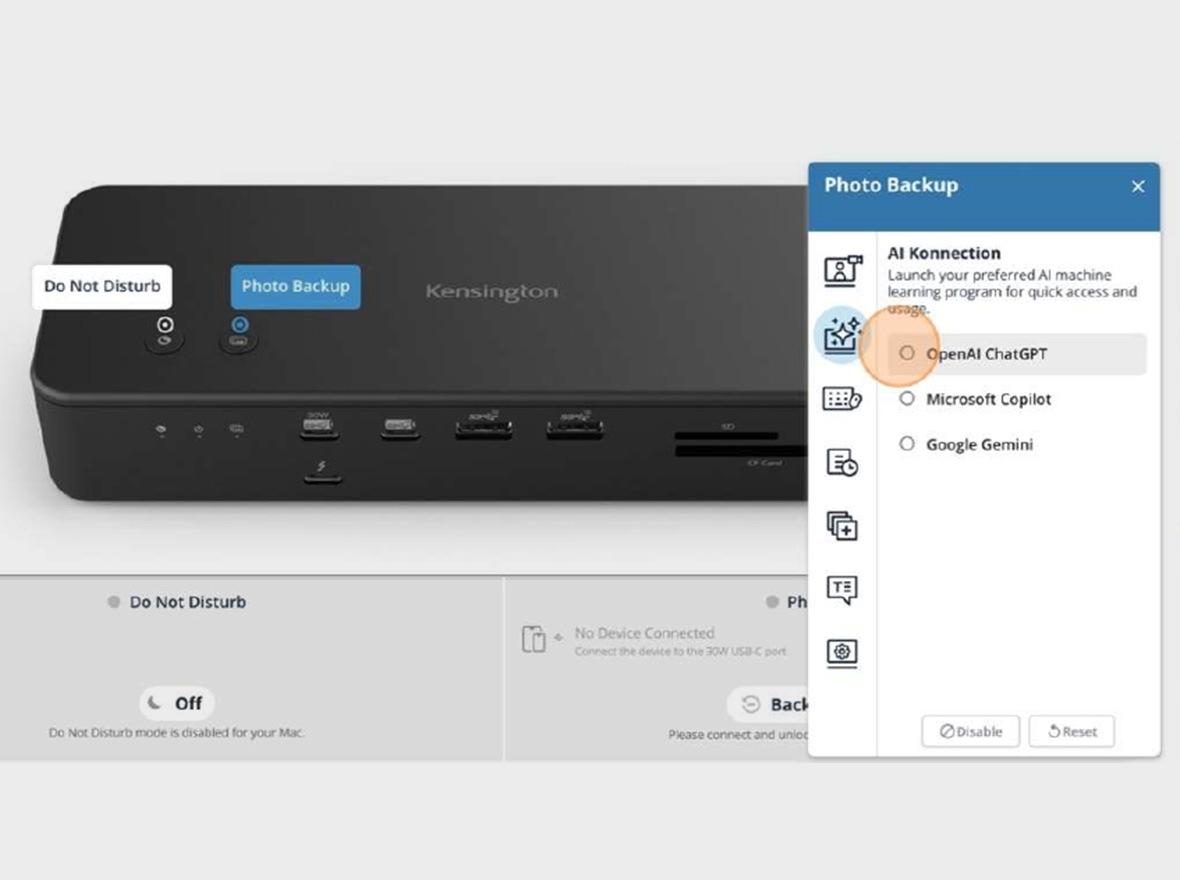
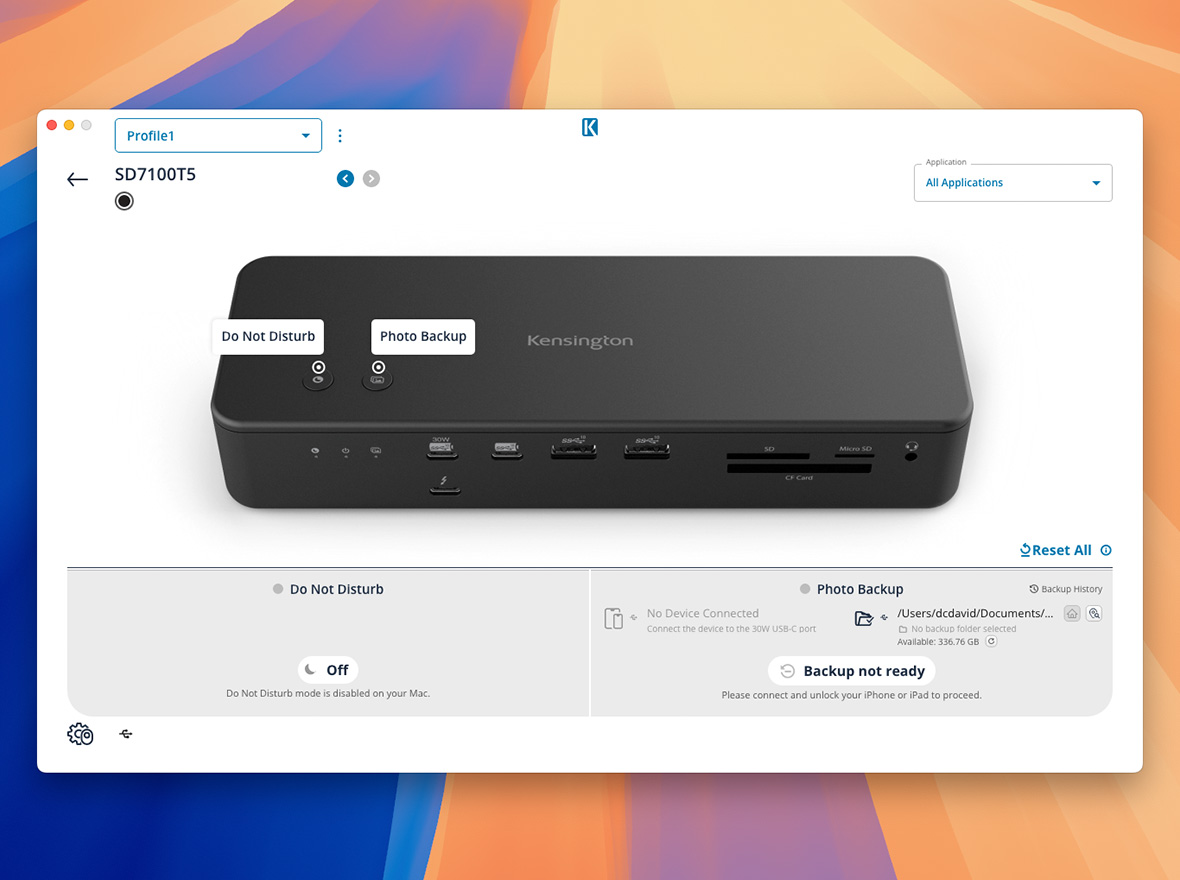
Do Not Disturb Button (macOS)
- Install and open Kensington Konnect™ on your MacBook.
- Connect the dock.
- The left button is pre-set to Do Not Disturb.
- Press once to enable (red light), press again to disable (no light).

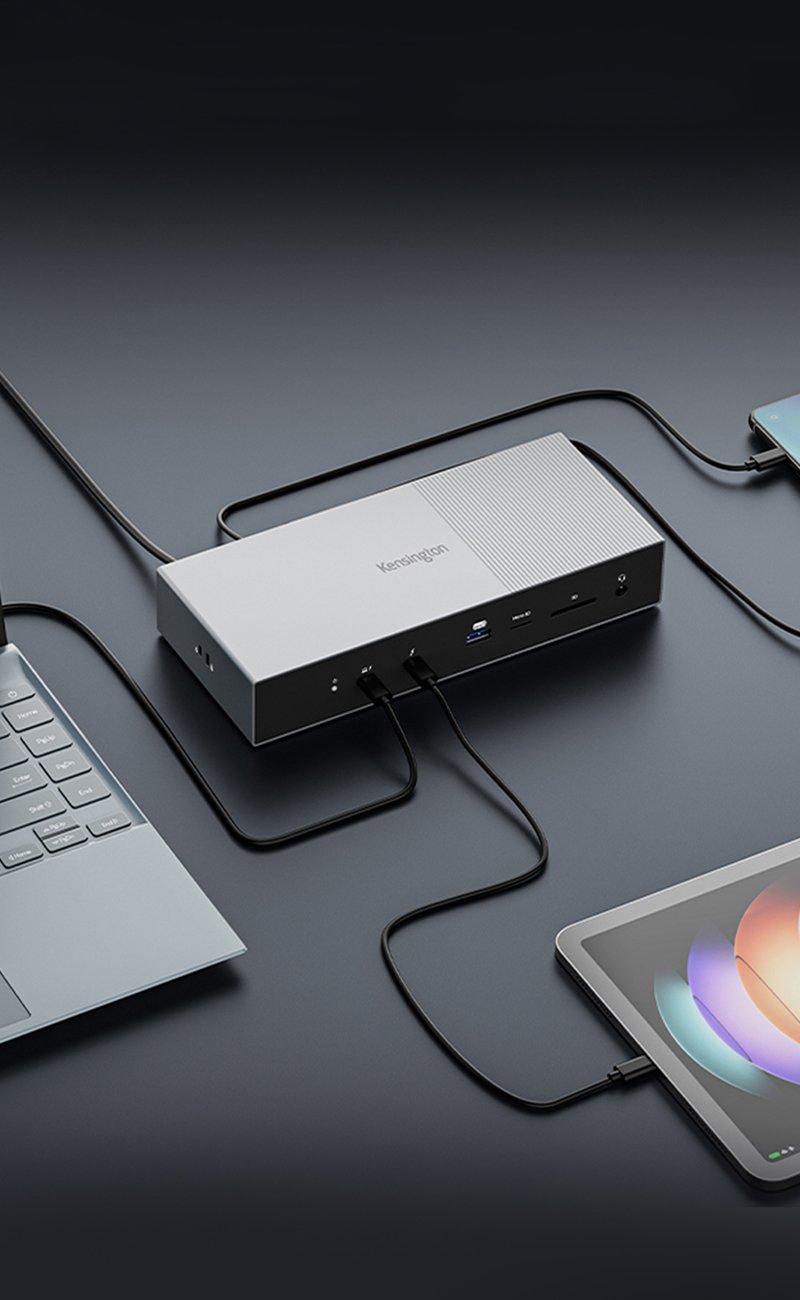
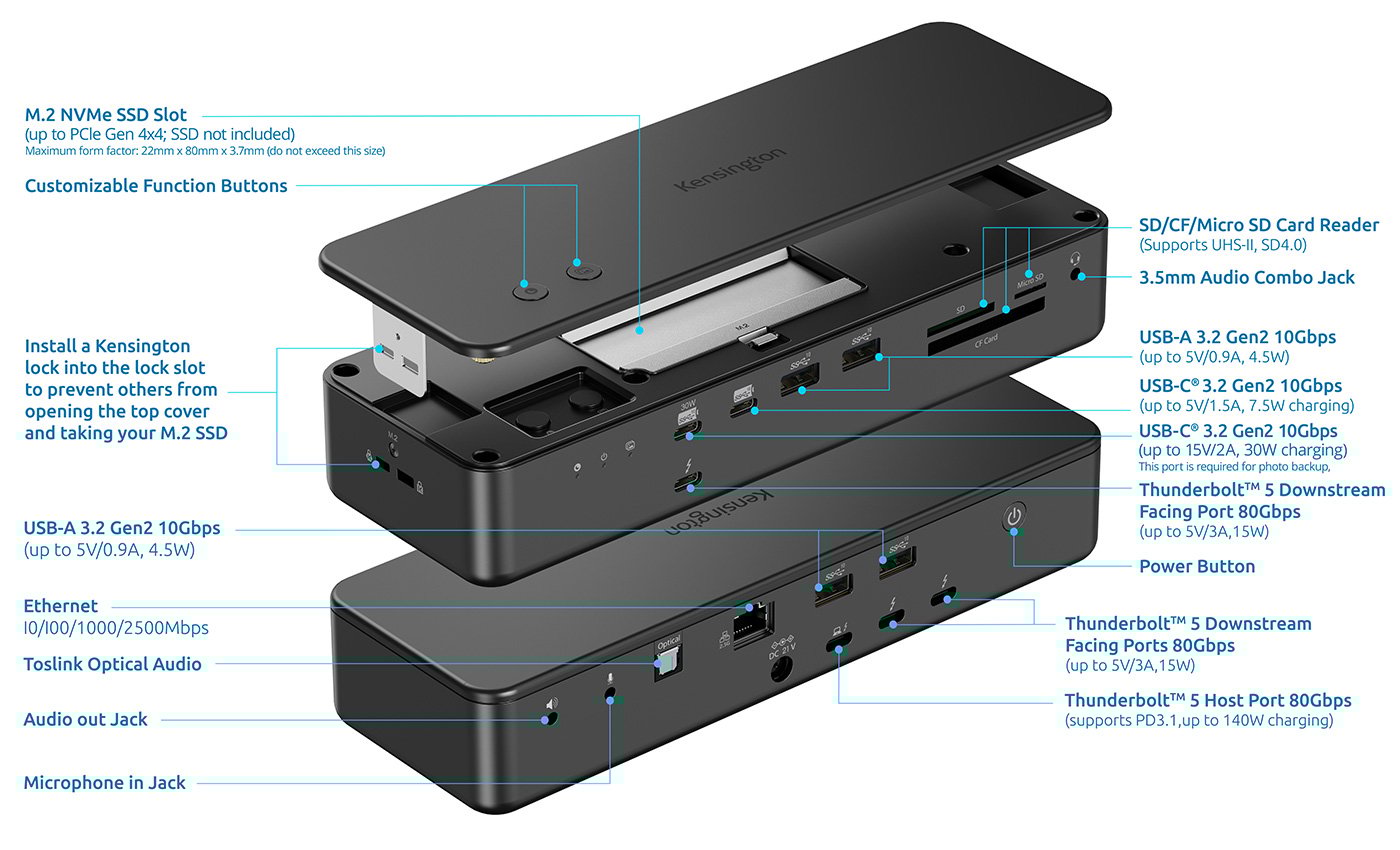
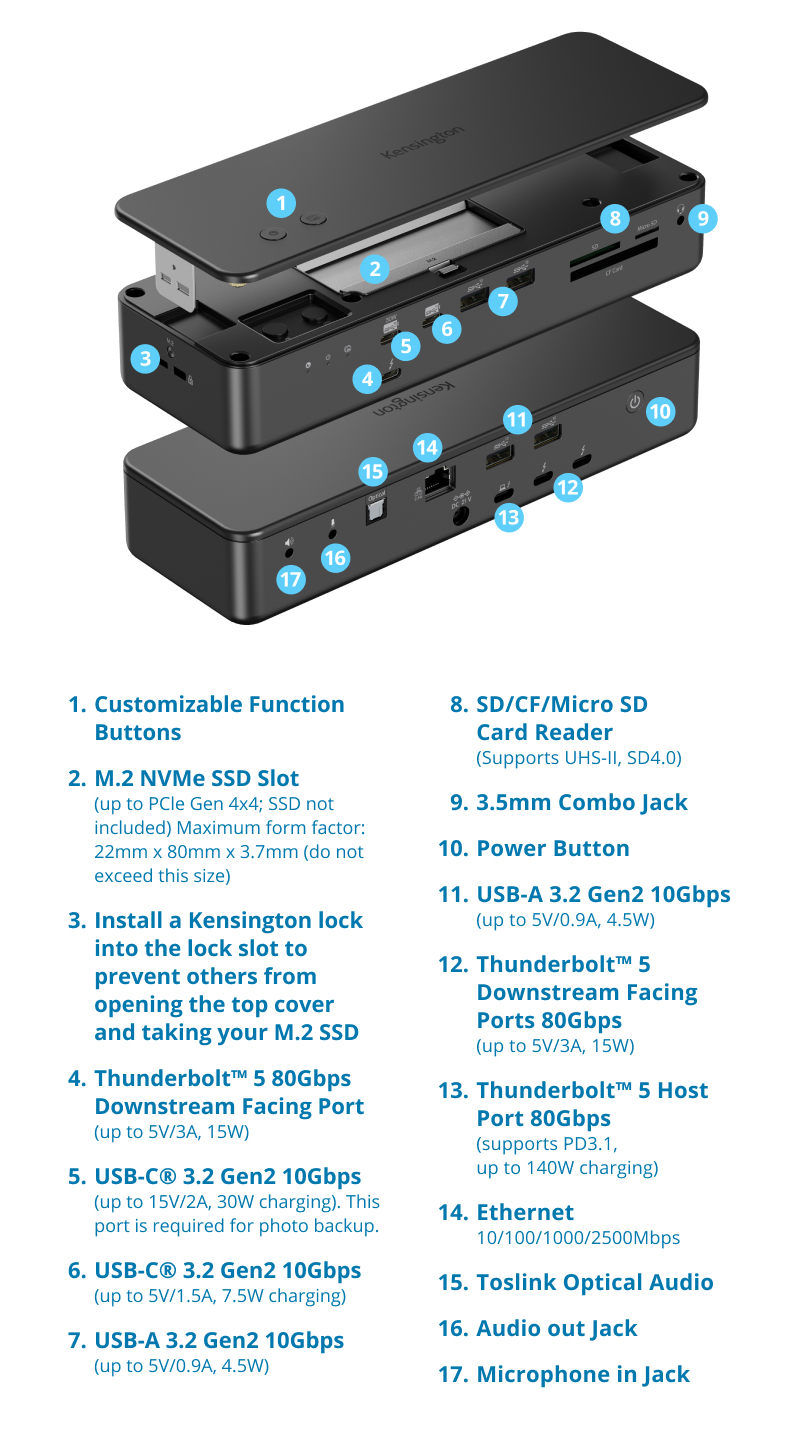
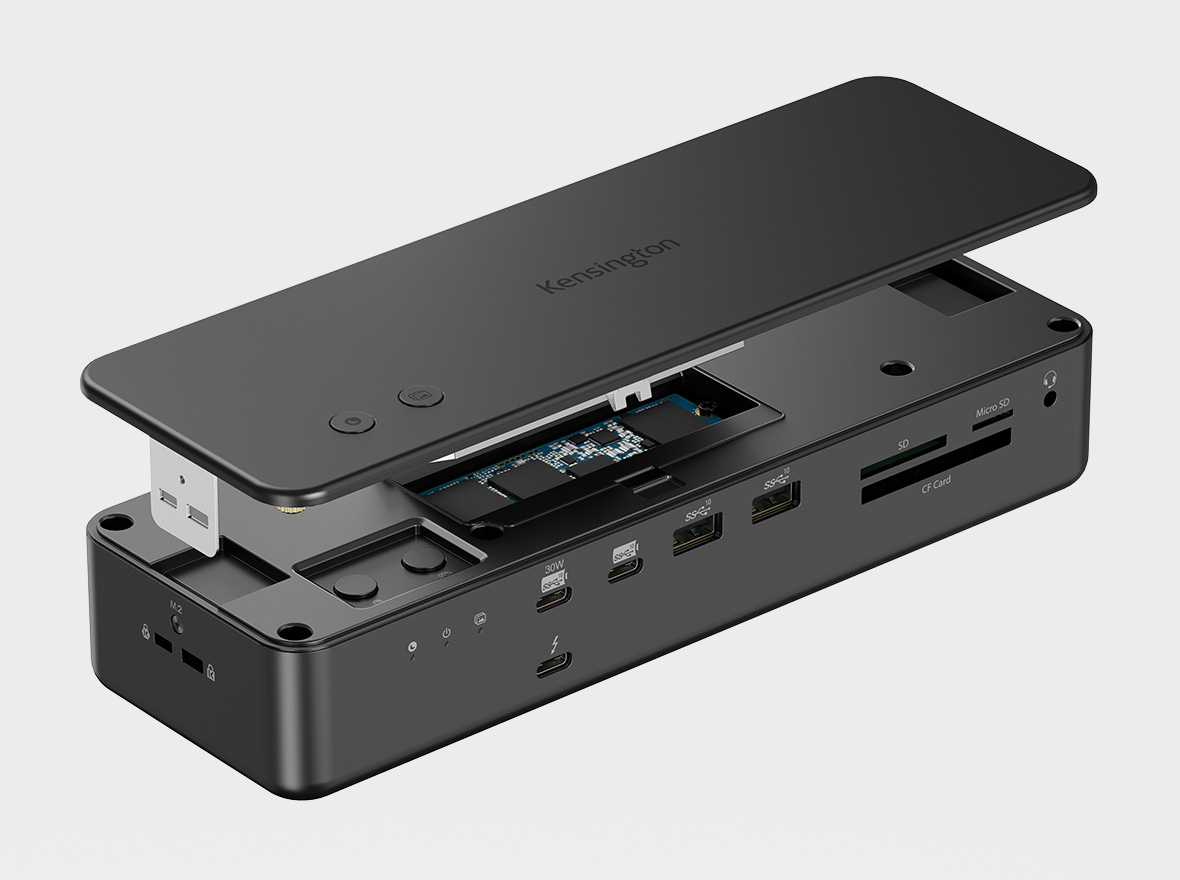
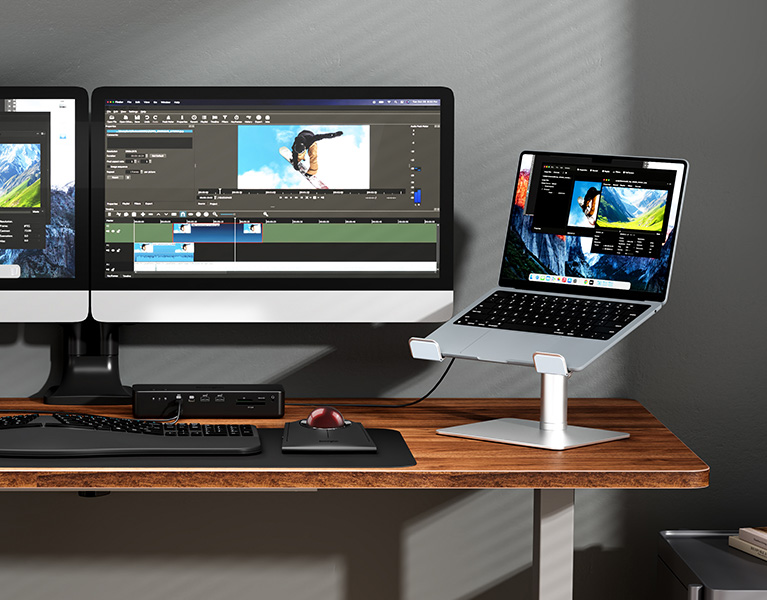
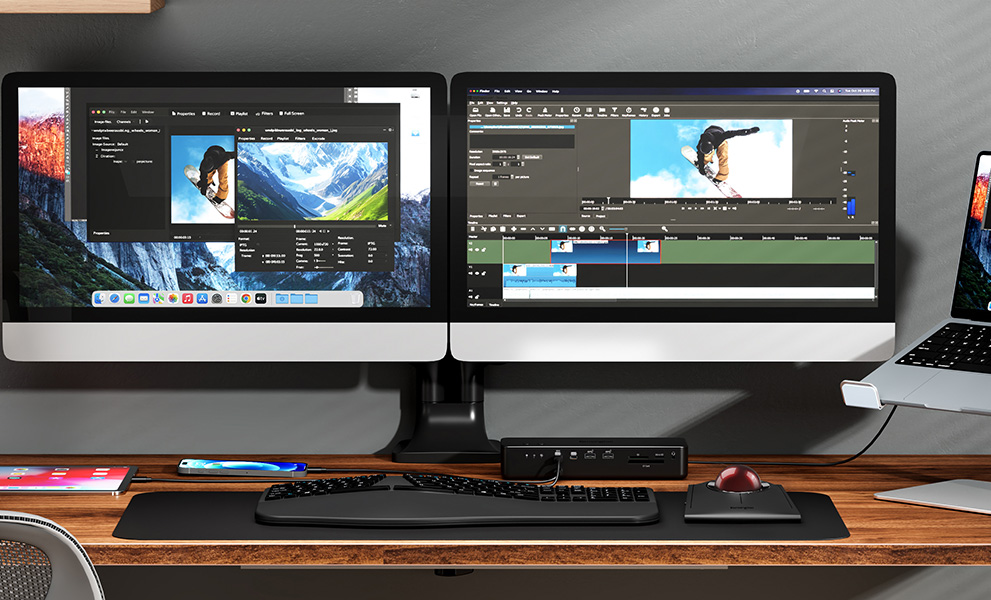
Seamless multi-monitor setups, 80Gbps transfers, 120Gbps bandwidth boost, and 140W power delivery.
Shop Now
Free Shipping on Orders $49+


Kensington aims high—from the quality and value of our products to the service and support we provide to our customers. Here’s everything you need to set up your new Kensington® EQ Pro Thunderbolt™ 5 Dock Designed for MacBook. Install Kensington Konnect™ on your laptop to activate the buttons.
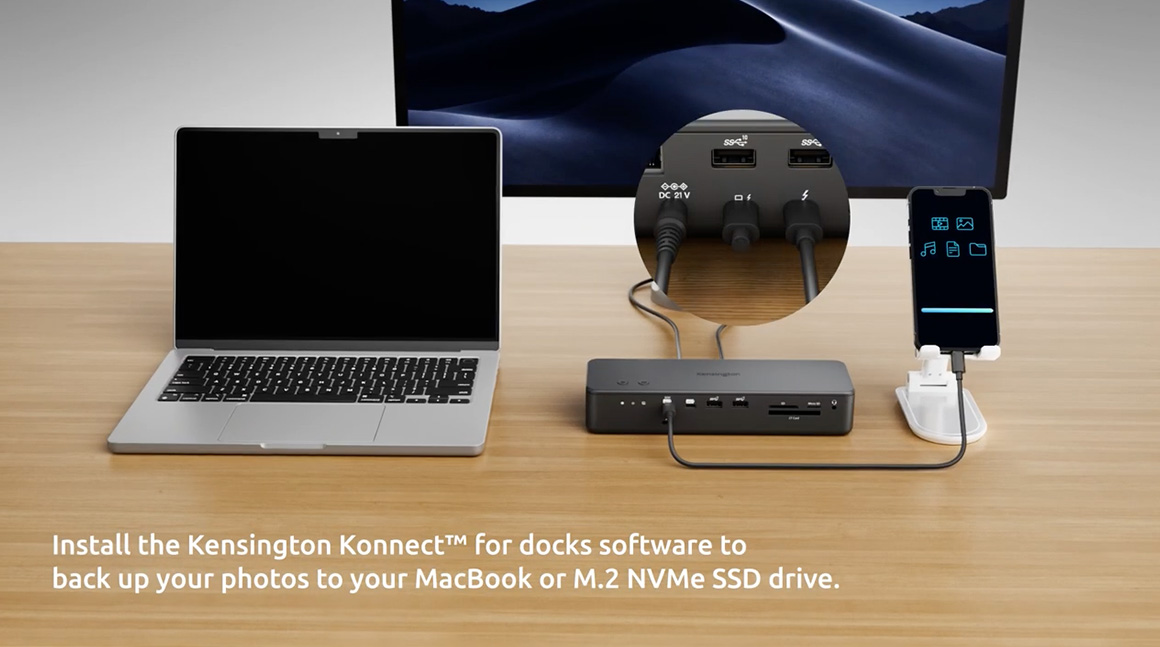
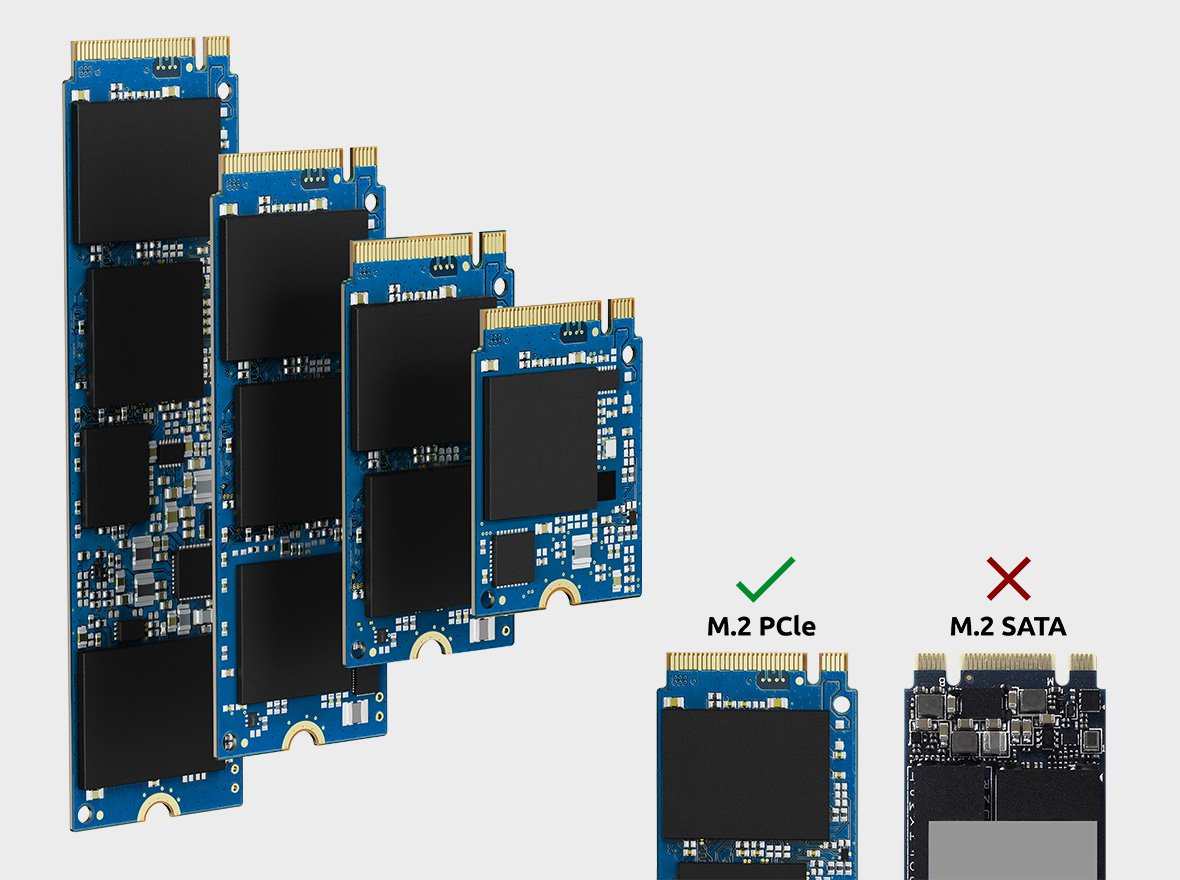
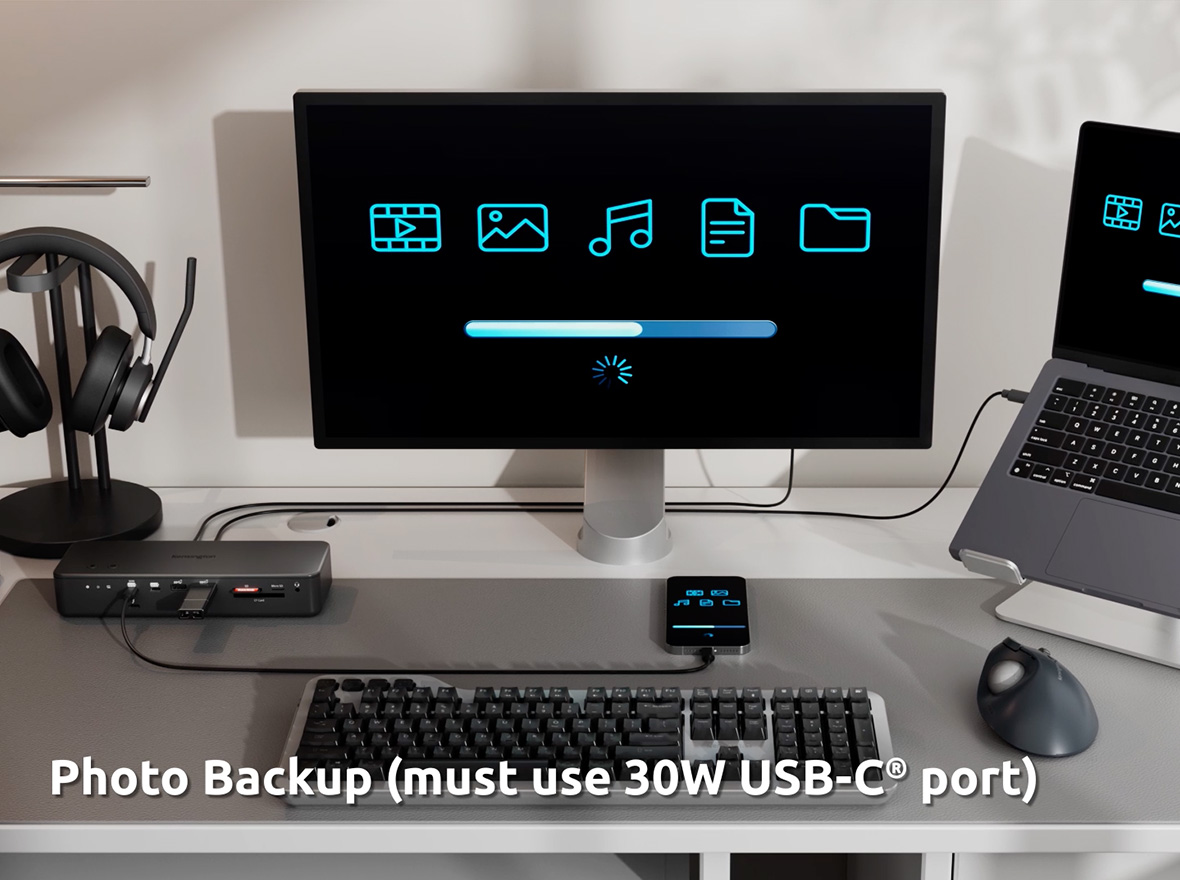
Download Kensington Konnect™Introducing the Kensington® EQ Pro Thunderbolt™ 5 Dock Designed for MacBook, optimized for M-series Pro/Max models. It offers 80Gbps data transfers, a built-in and lockable PCle M.2 SSD slot for quick storage expansion, and dedicated buttons for iPhone photo backups and Focus Mode. Supporting up to two 6K displays, multiple accessories, and up to 140W Power Delivery, the EQ Pro Thunderbolt™ Dock optimizes your workspace for maximum productivity.
Have a question about your Kensington® EQ Pro Thunderbolt™ 5 Dock? Need guidance with setup? Want to chat with a Kensington product specialist? Just scroll and select the resource you need.

Phone:
800-535-4242

Technical Support:
Support page

Live chat with a human:
Click the Live Chat tab on the right


Note: Format your M.2 SSD before first use. Use APFS for macOS, or exFAT for Windows/macOS.

Note: Do Not Disturb and Photo Backup are MacBook-only features. They are not available when using a Windows laptop.


Caution: Do not touch or remove the SSD immediately after use.

Choosing the Right Format
For more details, download the How to Format M.2 SSD PDF above.

No, MacBook models with the M4 Pro and M4 Max chipsets can only support two displays, even when using a Thunderbolt™ 5 port. While the dock allows for two external displays, you can enhance your setup by connecting additional monitors directly to the MacBook with M4 Max chipsets. For more information, visit the Apple support site.
No, MacBook models with the M1/M2 base chipsets only support one external display. In contrast, the M4 base, M1/M2/M3/M4 Pro, M1/M2/M3/M4 Max, and M1/M2 Ultra chipsets can support dual displays when the lid is open. The M3 base chipset can handle up to two displays even with the lid closed.
The dock can manage up to three video streams via its upstream connection. However, the actual number of supported displays depends on your laptop's specific configuration. Please check with your laptop manufacturer for the maximum video streams supported by the Thunderbolt™ 5 port. Generally, when used with a Thunderbolt™ 5 laptop, the dock supports:
Your laptop must have:
The dock is compatible with macOS 14.5 and later.
Yes, the dock includes a USB-C® port (up to 30W) and Thunderbolt™ 5 ports (up to 15W), all suitable for charging your phone or other smart devices. All ports feature KonstantCharge™, allowing you to charge devices even when undocked from the laptop.
The default settings for the buttons are Do Not Disturb (left) and Photo Backup (right). Visit our support page to download Kensington Konnect™ software and a step-by-step PDF guide to activate and customize the buttons.
Yes, you can customize the buttons to launch applications such as ChatGPT. Visit our support page to download the Kensington Konnect™ for Docks software and a PDF guide for assistance.
Yes, you can back up both iPhone and iPad using this dock. The dock will create a unique folder for each device, allowing you to back up multiple devices.
Yes, it supports USB-C® PD 3.1, providing up to 140W for laptop charging.
Yes, this dock supports daisy-chaining multiple Thunderbolt™ 5 devices, enabling you to connect additional peripherals and expand your workspace.
Choose a PCIe Gen4 M.2 SSD 2280. Visit our support page for the full compatible dimensions. We also provide a video guide on installing the M.2 SSD into the dock—make sure to watch it before you begin. Remember to place the screw in the notch on the board, as demonstrated in the video, to simplify the installation process.
No, the M.2 SSD may become hot during operation. Avoid touching or removing the SSD immediately after use. Allow ample time for it to cool down before handling or making any changes.
To access the SSD slot, you'll need a Phillips screwdriver to remove the side screw during your first attempt. Once the screw is removed, gently lift the top cover starting from the side near the screw. Raise it slightly until you see the reference line on the metal, then lift the opposite side to fully remove the cover. For detailed guidance, please refer to the step-by-step video and the PDF document on the support page.
Yes, format the M.2 SSD after installation in the dock. Here are the recommendations:
The dock includes a 3-year limited warranty. For more details on warranty coverage, please visit Kensington Warranty.
Yes, it includes security lock slots compatible with Kensington cable locks (K65020WW or K65021WW), sold separately. Use a Kensington security lock to secure both the dock and the M.2 NVMe SSD.
Yes, a mounting bracket is available separately (K34050WW).
No, Kensington’s DockWorks™ only supports Windows.
Yes, it features an Ethernet port that supports the 2.5 Gigabit Ethernet standard, providing a maximum data rate of 2.5 Gbps. Actual speeds may vary based on several factors, including your internet bandwidth and network hardware.
Ensure you're using Cat 5e or ideally Cat 6 cables. If you're using an older version of macOS, it may not support the Realtek chipset used in 2.5G adapters. Download and install the RTL8156 driver from the Realtek website to resolve this issue.
This dock offers four audio options. It includes a 3.5mm audio combo jack, a TOSLINK (optical fiber audio) port, a 3.5mm audio input, and a 3.5mm audio output.
If you don’t hear any sound, don’t worry! You might just need to select the correct audio device. Click the speaker icon on the taskbar, then click the arrow or device selection icon next to the volume bar. From the list, choose your preferred audio output device, such as your speakers, headphones, or the dock’s audio output.